The Inked Stamper-An evening of classes!!!


REMEMBER IT IS NEVER OK TO COPY OR MAKE A REPRODUCTION OF SOMEONE ELSES WORK/CREATION UNLESS YOU HAVE ASKED FOR PERMISSION.
I do not give permission for reproduction or recreation of my artworks or creations. Thank you all for respecting this.

Sunday, March 17, 2019

Stabilo Woody....

So let’s talk about this product for a moment. Apparently they are a kids crayon! Obviously I’m a child lol because I love these things!!! They are quite fun to use, they are like a cross between a pencil crayon and a crayon AND they are water soluble!

In the past I have used them on several projects but never just on there own, so this was sort of an experiment to see how they would work. I was quite impressed and I completely fell in love with how they laid down on the paper and the end result. I love the look of my finished projects.

Here’s a peek at what I created with them!


My first attempt 

My second attempt 


Sunday, March 10, 2019

So with all three comparisons done, here is a photo with all three side by side. On the left is the Faber Castell gelatos, in the middle is the Tim Holtz distress crayons and on the right is the Jane Davenport colorstick. All are similar but also different!


PART THREE:

Ok, so last but not least I used Jane Davenport colorsticks. Once again I tried to use colors as close as I could get. Honestly they were quite nice to use. They seemed to be much higher in pigment compared to the other two! They laid down quite nicely. Very easy to blend and because they seemed to be higher in pigment they didn’t seem to pill the paper, which I loved. Also they didn’t dry too quickly, they seemed to stay wetter a little longer so I didn’t have to rush. They were also easy to move and add the next color to for layering. I would have liked a darker brown, I found one too light, one too orange and the other almost reddish. I would love to see more colors in this line! I’m lazy and hate mixing colors to achieve what I’m looking for! I think of all three these were my favourite to use!

Jane Davenport colorstick - start to finish photos


Friday, March 8, 2019

PART TWO:

So part two of the comparison. So this time I used Tim Holtz distress crayons! I color matched the products the best I could. They have similar colors but definitely different results. I honestly found these a pain in the butt to use on there own, although this could be due to using them on a large area as opposed to a tag or a card. They were quite fast drying. They definitely didn’t blend as well as the gelatos! I found them almost gritty. They are more vibrant in color compared to the gelatos though, even the lightest colors are more vibrant. I did like the fact that they were faster drying when it came to the hair though! At this point I’m thinking gelatos for the skin and distress crayons for the hair! They aren’t too bad but if you are going to use them on there own I recommend working quickly and wetting your paper first to get better blending on your first layer!

Tim Holtz distress crayons - photos start to finish


Monday, March 4, 2019

So I have decided to do a three part post of a product comparison. I’ve had people ask me about these three products. Although I have all three products, I have never just used them on a project! So the three products are: #1 Faber Castell gelatos. #2 Tim Holtz distress crayons. #3 Jane Davenport colorstick. All work well when I’m doing mixed media but let’s see how they hold up on there own!

PART ONE:

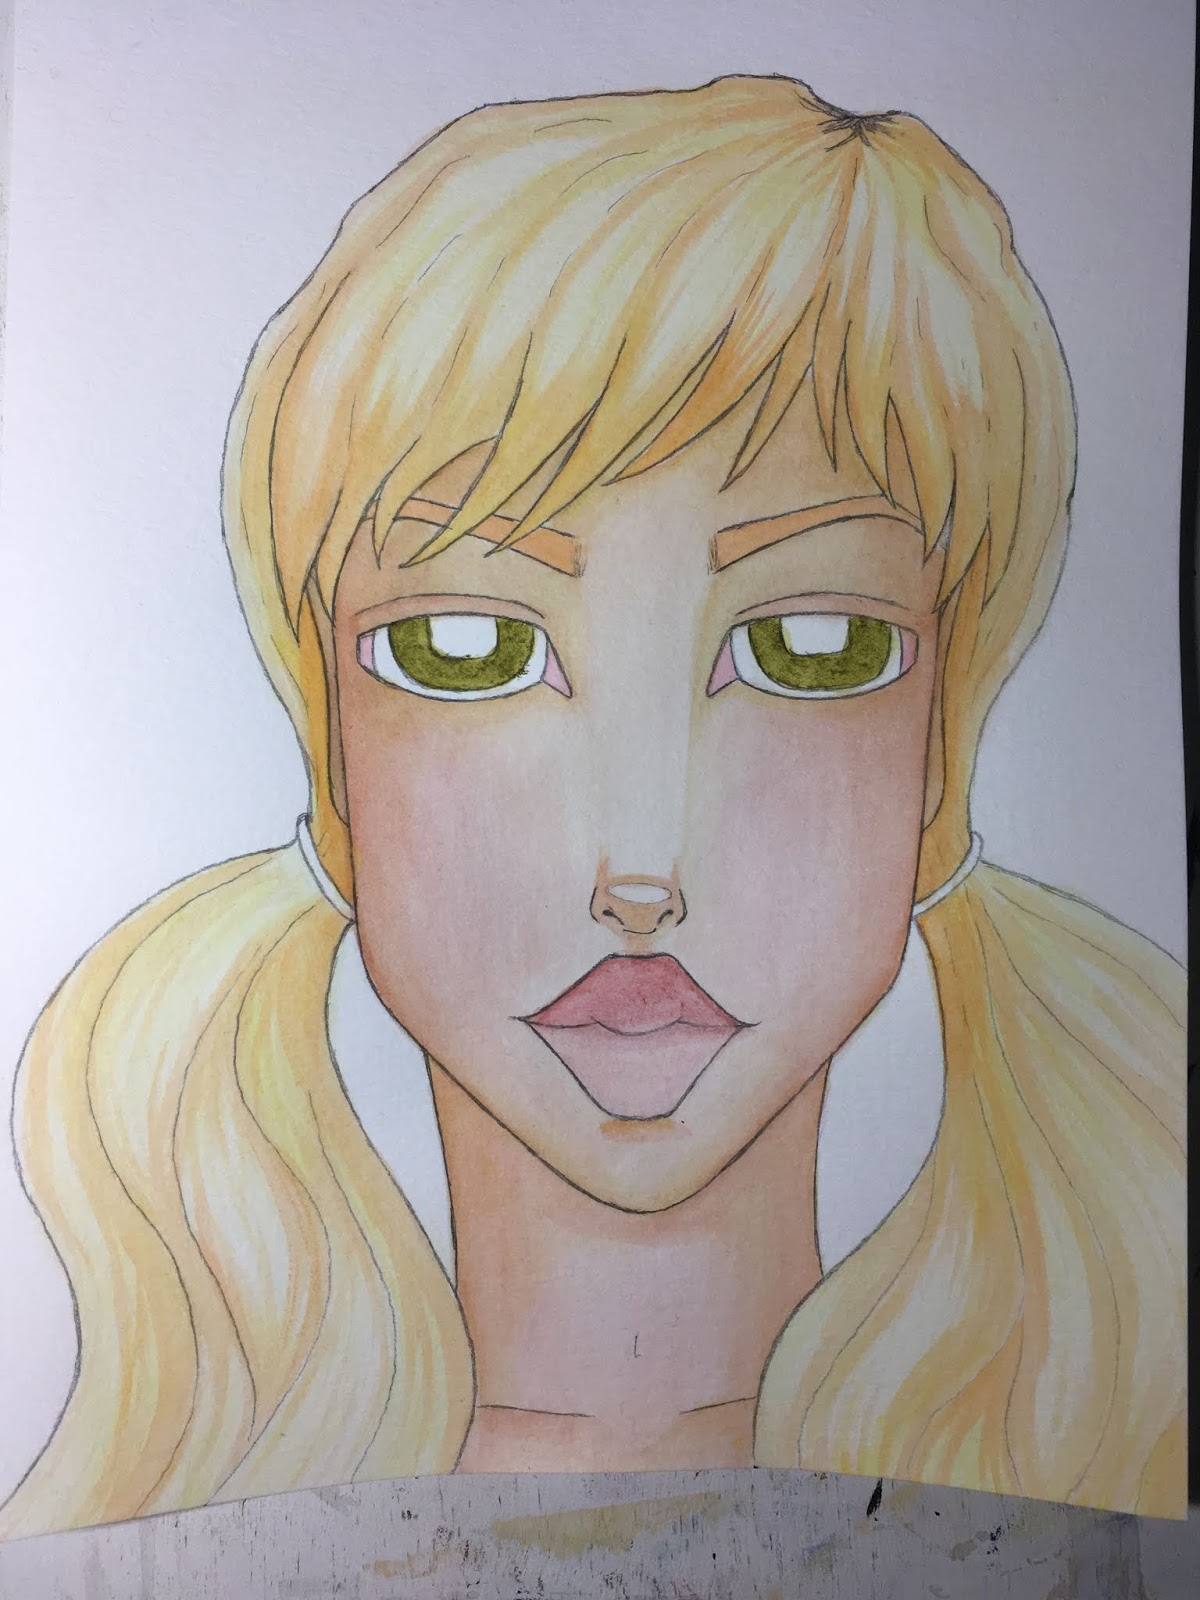
I sketched out one of my girls, then used my light board to replicate her two more times so I had three exact copies to paint with all three products. I used Canson XL watercolor paper cold press 140. Since they are water soluble I wanted to use them like watercolor to see what the result would be!

These weren’t too bad to work with on there own. If you are looking for a nice soft look then these will do that, they are quite translucent so it took a lot of layers to build up color. This leads to one of the problems. After so many layers the paper pills. I had to do tons of waiting and drying to achieve this look and the paper still pilled. I did not like that. I found that they were easily moved but wanted to gob up in areas. I found it was a lot of work to try and make them blend effortlessly. I could see where a beginner could become extremely frustrated with them! I did like the result though, very soft and pretty. If you are going to use them this way be VERY patient!


Faber Castell gelatos - start to finish in pictures


Thursday, February 21, 2019

Hi all, it’s been so long since I’ve posted on here. I have been concentrating on my art for sometime now and I’m loving it! Here’s a fun exercise to try! Get your paper wet and use watercolor or ink and drop the colors randomly onto the page. When it is dry try and see a picture in the blotches and bring it to life in whatever mediums you choose! For mine I used ink, watercolor, pencil crayon, posca pens and much more! Remember to have fun, the exercise is meant to relax you and to just have fun with your art!