The Inked Stamper-An evening of classes!!!


REMEMBER IT IS NEVER OK TO COPY OR MAKE A REPRODUCTION OF SOMEONE ELSES WORK/CREATION UNLESS YOU HAVE ASKED FOR PERMISSION.
I do not give permission for reproduction or recreation of my artworks or creations. Thank you all for respecting this.

Thursday, July 26, 2012

My Mechanical Garden...

Wall Sugar Co. Design Team Challenge - Perfect Posies...


Let me start off by saying that this project is one of the reasons why I adore Wall Sugar product. The versatility of their product is virtually limitless!

This is what i started with...


So this month I was given the Perfect Posies set (http://wallsugar.myshopify.com/collections/all/products/perfect-posies ) as my design team challenge. I was thrilled to work on the perfect posies, they present so many different possibilities as a blank canvas, but this is my version of the Perfect Posies!

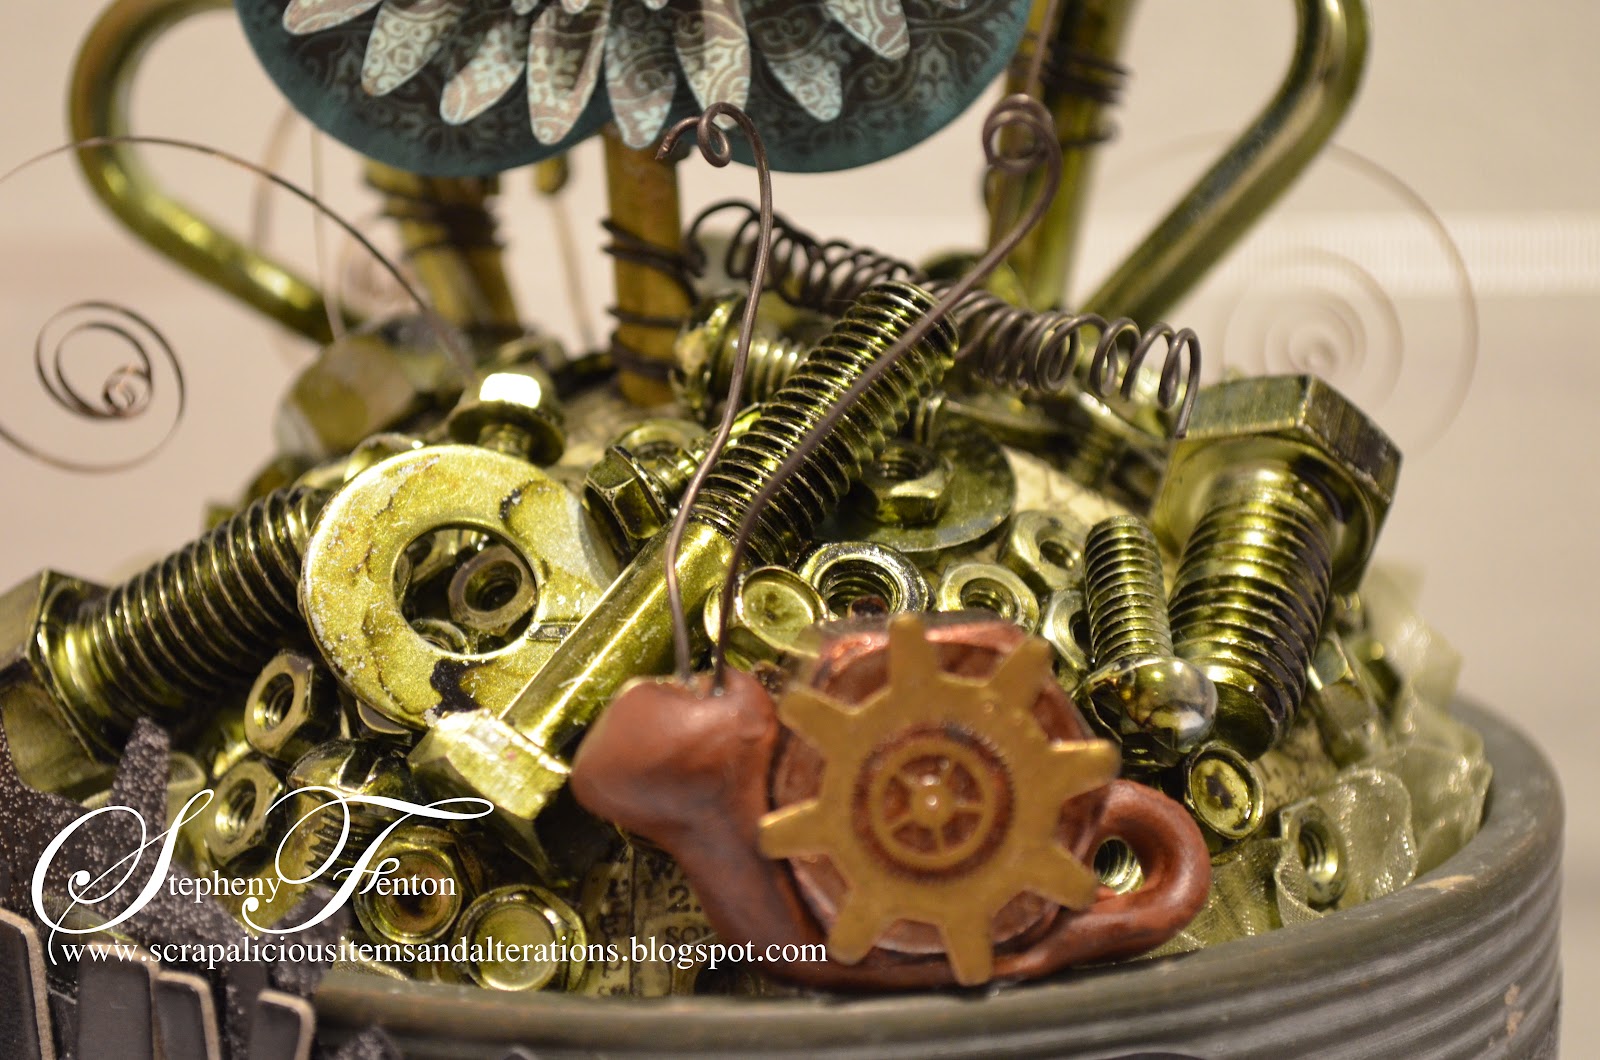
I used a variety of nuts/bolts and whatnots from the hardware store. I took heavy fencing wire and made a vine per say on the stems and used it to adhere the metal leaves. I stained the posies with Tim Holtz distress stain - broken china. I used a small gage wood doweling as the stems and stained them with Tim Holtz distress ink – forest moss. I covered a styrofoam ball in Tim Holtz tissue tape and stained it with forest moss distress ink, then hot glued the ball into place in the flower pot. I placed all the nuts, bolts and hardware in a jar and added Tim Holtz adirondack ink – pesto to stain them. They are adhered to the Styrofoam ball with liquid glass and I added old watch coils to look like small grassy vines. I adhered Graphic45 Kraft Refections paper and glued it to the posies to create the base and sanded them smooth and then stained them with the broken china. For the large posie I traced and cut two each of the three sizes of the perfect posies and stained them. This makes up the front and back of the large posie . Next I used the sizzix to cut two sets of the Tim Holtz tattered florals die and stained them, which makes up the front and back of the medium posie. I then cut four sets of the sizzix flower daisies #2 die, and stained them and that makes the front and back of the small posie. Then added a menagerie of gears, watch parts and what not to make up the centers of the flowers. In between the petals of the medium and large flowers I used Tim Holtz alterations gadget gears die and Tim Holtz aterations movers and shapers gears die and cut them out of black cardstock, I mixed black and silver embossing powder together to create a metal look. I then tucked the gears in between the petals and adhered them in place. I added a little snail that I crafted out of polymer clay. His shell is a nut and a die cut gear and old watch part gears with wire for antenna’s.  For the flower pot I used the sizzix top note die to cut a piece of grunge board and then used the Tim Holtz alterations texture fades embossing folder – steampunk and then used Tim Holtz distress ink black soot Tim Holtz distress ink broken china to achieve the color. I added the embossed gears in the same way that is mentioned above. I put in two eyelets and ran the ribbon through the eyelets and tied it off to one side. I next added the lettering. The black lettering is Thickers black shoe box and the sliver lettering is Thickers silver dear lizzy. I adhered the letters on with liquid glass for extra support.
Here are some additional photos...
Front


The Back...


I hope you enjoyed My Mechanical Garden as much as I enjoyed creating it!!!


Thanks for stopping by :)
Stepheny


Monday, July 9, 2012

Contest Winner Congrats...

A great big HUGE thank you to all who played along for the contest and a HUGE congrats to Sharon Gullikson for being the big winner!!!!


Thank you to all for following the Wall Sugar Team Member blogs! You'll love all the inspiration and creativity shared on these great blogs! After a random drawing, congrats to Sharon Gullikson for winning the awesome Wall Sugar product! http://www.wallsugar.blogspot.ca/

Thanks for stopping by :)
Stepheny

Saturday, July 7, 2012

Contest time...

IT'S TIME FOR A CONTEST!! We love to share inspiration and craftiness! Head on over and "follow" each of the Wall Sugar Team member blogs below. Comment on our facebook page here that you've done so and we will pick one random winner on Friday July 6th...how easy is that?! The winner will receive an awesome Wall Sugar product!!

http://www.antenucci.blogspot.ca/
http://www.scrapaliciousitemsandalterations.blogspot.ca/
http://www.willworkforbuttons.blogspot.ca/
http://www.validationofvicki.blogspot.ca/
http://www.shaylennetwele.blogspot.ca/

Wednesday, June 27, 2012

Daughter....

I just love going back to classy classic black and white....and what a lovely canvas using Bo Bunny Enchanted line! Such a beautiful collection, i just adore it, i had a wonderful time creating this layout!!!


Thanks for stopping by :)
Stepheny


Tuesday, June 26, 2012

Wall Sugar Co reveal....

Some exciting things have been happening for Wall Sugar Co....

A HUGE CONGRATULATIONS to Scrapbook News & Review Magazine for launching The Art Studio, an online classroom full of fun, amazing and creative classes!! This weekend kicks off the official launch of The Art Studio. A dozen classes are now available for purchase and as you will see, there are plenty more coming your way. Head on over to The Art Studio and check out the fantastic classes you can take, including scrapbooking, digital scrapbooking, cards and stamping, mixed media, altered art, home décor and more. Don't miss the little up and down arrows in each categories. You may only see four classes in each but click on the arrow buttons and you'll see even more educational goodness! So take a look around, get to know the place, and get ready to find your creative bliss!
Our fearless leader (owner of Wall Sugar Co) will be teaching classes for the Art Studio. The first class is Food For Thought which if you sign up for, you are entered to win your registration fee!!! Also a second class will be coming up on August 18th...Perfect Posies!!! Registration is limited, so don't miss out on signing up for these excellent classes!

Head over to Wall Sugar Co to check out all the information on this exciting news!!!

Thanks for stopping by
Stepheny :)

Friday, June 22, 2012

Exciting News tomorrow....

Make sure you head over to Wall Sugar Co tomorrow to check out the new exciting news!!!! http://www.wallsugar.blogspot.ca/?m=1 Thanks for stoping by :) Stepheny

Tuesday, June 19, 2012

Grunge Blocks...

Wall Sugar creates the most awesome canvas for my scrapalicious mind!! As soon as i laid eyes on Wall Sugar Co's, ( http://wallsugar.myshopify.com/collections/all )bare block-wired, i was in love!!! This idea just popped into my head and so i ran with it!!! The idea of course starts with a Wall Sugar block, ends in alot of Tim Holtz product and VOILA, you have yourself what i call a Grunge Block!

The front of the Brown Grunge Block (vintage photo)

 Back

 Here is the second take i did on the Gunge Block in red (aged mahogany)

 Back
If you are interested in trying out these awesome little blocks, either re-creating my idea, or if they already have your creative juices flowing, please check out Wall Sugar Co. ( http://www.wallsugar.blogspot.ca/ )

Thanks for stopping by :)
Stepheny