The Inked Stamper-An evening of classes!!!


REMEMBER IT IS NEVER OK TO COPY OR MAKE A REPRODUCTION OF SOMEONE ELSES WORK/CREATION UNLESS YOU HAVE ASKED FOR PERMISSION.
I do not give permission for reproduction or recreation of my artworks or creations. Thank you all for respecting this.

Friday, September 7, 2012

Medevil Greetings...

Hello all,

Here is one of my recent cards i have done using copics and a clip art image!


The finished product...
 
So i started with a clip art image from google...
 
I colored the horse in with a one color series in copics...E30 E31 E33, trimmed around him, then took E30 and inked all they way around around the edges to take the white away.
 
This is the finished project after assembly...
 
A close up of the detail...
 
 
The inside...

 
SUPPLIES:
 
Copic E30 E31 E33
War Horse: Clip art from google
3 piece metal charm-Walmart build your own jewelry
Dress it up-Flats in tuscon (orange jewels on metal)
American Crafts black cardstock
American Crafts cream cardstock
Graphic 45 Olde Curiosity Shoppe Collection - olde curiosity shoppe (black diamond) and counting down (orange newsprint)
Pewter brads
Tim Holtz visual artistry-flights of fancy (verse)
 
 
I hope you enjoyed veiwing my project as much as i enjoyed creating it!
 
Thanks for stopping by :)
Stepheny


Monday, September 3, 2012

Haunted House Hanger...

 
Wall Sugar Co. Design Team Challenge -  3 Piece Interchangable Wall Hanger


This challenge was all about Halloween and a three Piece Interchangeable Wall Hanger (http://wallsugar.myshopify.com/collections/all/products/3-piece-interchangable-wall-hanger) . As you can see below this is the bare piece i started with...


 So for those of you who know me, know that this month was quite the challenge for me. You see although i love Halloween, i don't really scrapbook it. For some reason i find i get lost in all the patterns or i find the patterns childish, hence i can't seem to do anything Halloween-ish :) So i brought out my sketch book and a pack of Halloween paper (My Minds Eye - The Spiders Web) i had been hoarding for just the right project, and little did i know this project was going to be perfect for it.
 
 
 As the end result, this is what i came up with...


The process...
 
I started by painting the outer edges of the wall hanger black, with just a plain black acrylic paint.
 
 
I then took MME-Toil and Trouble and used it as the striped base. Then took MME-Halloween Night and decided what part i wanted (in my case the tree) and cut and tore it to fit the left hand side of my project. Then poked open the holes for the wire.
 
NOTE: Even when a project has spacing, a continuous pattern can still be used to create a full picture look!
 
I next sanded all the edges nice and smooth and then ONLY inked the outside edge of the whole project.
 
TIP: If you take sand paper and wrap it around a pencil it is easier to sand the wire holes!
 
I used Distress Ink-Antique Linen to go around the outter edges of the project. I repeated this process several times until i got the desired effect i was looking for.
 
TIP: Ink is your friend, don't be afraid of it, use it!!! It inhances your project!!!
 

I used a Haunted House poem i found on the internet. I chose the font i liked and then i double spaced it and printed it on white AC (American Crafts) cardstock. Double spacing it made it easy to cut into strips for the project. All edges of the white were inked with Distress Ink-Antique Linen. The letters are done in three layers...1. White AC cardstock 2. MME-Witches Lace (orange) 3. MME-Witches Lace-backside (black)
 
I next took The moon cut out from the MME collection and inked it with Antique Linen. Next i took the chipboard fence (Riff Raff) and inked it with Distress Ink-Black Soot. The house is a printout on AC white cardstock, from an online coloring book, which has been cut out and inked with Antique Linen.
NOTE: In this photo i am just laying everything out to make sure i get everything where i want it before i glue it down!
 
Once everything was where i wanted it, i started gluing it down. The moon is only glued to the center piece and the haunted house is only glued to the bottom piece, this gives the project the freedom to move around without damaging your project. I used liquid glass.
 
I cut and inked the three little pumpkins from MME-Pumpkin Patch, and glued them on with liquid glass.
 
Next was the final finishing touches. I put all the wire back onto the wall hanger. I repeated the lettering steps for the title "Haunted House" and tied it on with three sizes of black ribbon (Large tule, med width sheer and small solid black ribbon). Then i took glass bottles (7gypsies-amber and Tim Holtz idea-ology corked vials-clear) and rubbed a label on each from 7gypsies-color rubbings-Apothecary. I hot glued them in place. Next the skeleton (a wooden piece from Treasured Memories in Edmonton) I placed his leg into the coiled handle and tied him in with black hemp twine, then tied the three sizes of ribbon to the wire in front of him. Voila....project finished!

TIP: Using a good mix of different sized ribbons in a color scheme can add that extra flair to your project!
 
The poem i used reads...
 
Haunted House
There's a house upon the hilltop, We will not go inside,
For that is where the witches live, Where ghosts and goblins hide,
Tonight they have their party, All the lights are burning bright,
But oh we will not go inside, The haunted house tonight,
The demons there are whirling, And the spirits swirl about,
They sing their songs to Halloween, "Come join the fun," they shout,
But we do not want to go there, So we run with all our might,
And oh we will not go inside, The haunted house tonight.
 
 
Once again the completed project...


I hope you enjoyed viewing my project as much as i enjoyed creating it. If you would like to purchase this bare wall hanger to re-create my project, or to create your own beautiful project, then head on over to Wall Sugar Co. to get yours!
 
Thanks for stopping by :)
Stepheny


Thursday, August 30, 2012

Scrapbookers Paradise....now carries Wall Sugar Co. product


We are so happy to welcome our newest retailer, Scrapbooker's Paradise! They have two fabulous locations where you can find our products:

South Calgary
Macleod Plaza
#20, 9250 Macleod Trail S.
...
1-403-253-4799
M-F 10:00 - 9:00
Sat 10.00 - 5:00

North Calgary
Crowfoot Crossing
45 Crowfoot Terrace NW
1-403-547-8522
M-F 10.00 - 9:00
Sat 10.00 - 5:00
Sun 12:00 - 5:00
 
Scrapbooker's Paradise - Facebook Page
 
Thanks for stopping by ;)
Stepheny

Thursday, July 26, 2012

My Mechanical Garden...

Wall Sugar Co. Design Team Challenge - Perfect Posies...


Let me start off by saying that this project is one of the reasons why I adore Wall Sugar product. The versatility of their product is virtually limitless!

This is what i started with...


So this month I was given the Perfect Posies set (http://wallsugar.myshopify.com/collections/all/products/perfect-posies ) as my design team challenge. I was thrilled to work on the perfect posies, they present so many different possibilities as a blank canvas, but this is my version of the Perfect Posies!

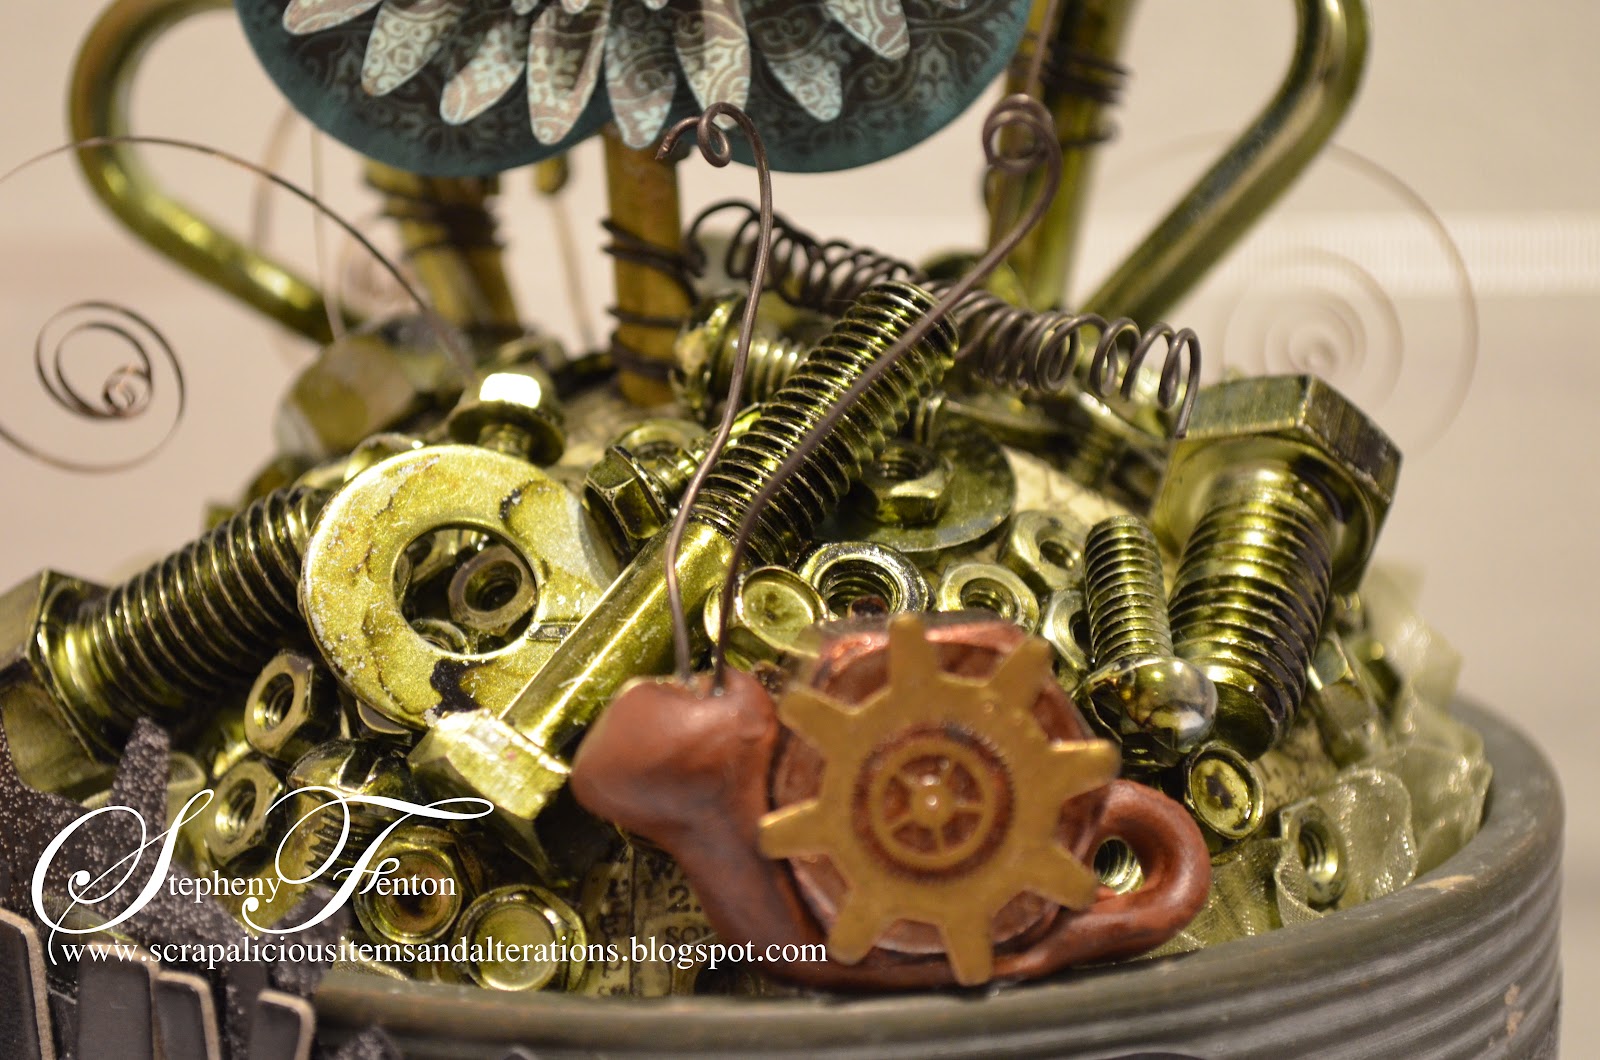
I used a variety of nuts/bolts and whatnots from the hardware store. I took heavy fencing wire and made a vine per say on the stems and used it to adhere the metal leaves. I stained the posies with Tim Holtz distress stain - broken china. I used a small gage wood doweling as the stems and stained them with Tim Holtz distress ink – forest moss. I covered a styrofoam ball in Tim Holtz tissue tape and stained it with forest moss distress ink, then hot glued the ball into place in the flower pot. I placed all the nuts, bolts and hardware in a jar and added Tim Holtz adirondack ink – pesto to stain them. They are adhered to the Styrofoam ball with liquid glass and I added old watch coils to look like small grassy vines. I adhered Graphic45 Kraft Refections paper and glued it to the posies to create the base and sanded them smooth and then stained them with the broken china. For the large posie I traced and cut two each of the three sizes of the perfect posies and stained them. This makes up the front and back of the large posie . Next I used the sizzix to cut two sets of the Tim Holtz tattered florals die and stained them, which makes up the front and back of the medium posie. I then cut four sets of the sizzix flower daisies #2 die, and stained them and that makes the front and back of the small posie. Then added a menagerie of gears, watch parts and what not to make up the centers of the flowers. In between the petals of the medium and large flowers I used Tim Holtz alterations gadget gears die and Tim Holtz aterations movers and shapers gears die and cut them out of black cardstock, I mixed black and silver embossing powder together to create a metal look. I then tucked the gears in between the petals and adhered them in place. I added a little snail that I crafted out of polymer clay. His shell is a nut and a die cut gear and old watch part gears with wire for antenna’s.  For the flower pot I used the sizzix top note die to cut a piece of grunge board and then used the Tim Holtz alterations texture fades embossing folder – steampunk and then used Tim Holtz distress ink black soot Tim Holtz distress ink broken china to achieve the color. I added the embossed gears in the same way that is mentioned above. I put in two eyelets and ran the ribbon through the eyelets and tied it off to one side. I next added the lettering. The black lettering is Thickers black shoe box and the sliver lettering is Thickers silver dear lizzy. I adhered the letters on with liquid glass for extra support.
Here are some additional photos...
Front


The Back...


I hope you enjoyed My Mechanical Garden as much as I enjoyed creating it!!!


Thanks for stopping by :)
Stepheny


Monday, July 9, 2012

Contest Winner Congrats...

A great big HUGE thank you to all who played along for the contest and a HUGE congrats to Sharon Gullikson for being the big winner!!!!


Thank you to all for following the Wall Sugar Team Member blogs! You'll love all the inspiration and creativity shared on these great blogs! After a random drawing, congrats to Sharon Gullikson for winning the awesome Wall Sugar product! http://www.wallsugar.blogspot.ca/

Thanks for stopping by :)
Stepheny

Saturday, July 7, 2012

Contest time...

IT'S TIME FOR A CONTEST!! We love to share inspiration and craftiness! Head on over and "follow" each of the Wall Sugar Team member blogs below. Comment on our facebook page here that you've done so and we will pick one random winner on Friday July 6th...how easy is that?! The winner will receive an awesome Wall Sugar product!!

http://www.antenucci.blogspot.ca/
http://www.scrapaliciousitemsandalterations.blogspot.ca/
http://www.willworkforbuttons.blogspot.ca/
http://www.validationofvicki.blogspot.ca/
http://www.shaylennetwele.blogspot.ca/

Wednesday, June 27, 2012

Daughter....

I just love going back to classy classic black and white....and what a lovely canvas using Bo Bunny Enchanted line! Such a beautiful collection, i just adore it, i had a wonderful time creating this layout!!!


Thanks for stopping by :)
Stepheny